C Is For Cookie
(spoken)
Now what starts with the letter C?
Cookie starts with C
Let's think of other things
That starts with C
Oh, who cares about the other things?
(sing)
C is for cookie, that's good enough for me
C is for cookie, that's good enough for me
C is for cookie, that's good enough for me
Oh, cookie, cookie, cookie starts with C
C is for cookie, that's good enough for me
C is for cookie, that's good enough for me
C is for cookie, that's good enough for me
Oh, cookie, cookie, cookie starts with C
(spoken)
Hey you know what?
A round cookie with one bite out of it
Looks like a C
A round donut with one bite out of it
Also looks like a C
But it is not as good as a cookie
Oh and the moon sometimes looks like a C
But you can't eat that, so
(sing)
C is for cookie, that's good enough for me, yeah!
C is for cookie, that's good enough for me
C is for cookie, that's good enough for me
Oh, cookie, cookie, cookie starts with C, yeah!
Cookie, cookie, cookie starts with C, oh boy!
Cookie, cookie, cookie starts with C!


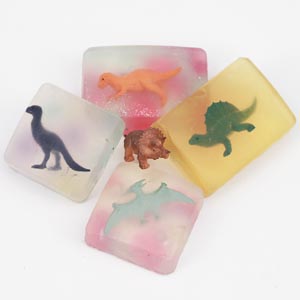 It's hard to resist adding a fun project to clean up. Make decorative soaps for a fun look at dinosaurs.